User Manuals & How-to guides

How to install SL, UL and Helix chainrings on TRS and LG1 cranks with adjustable chainline (Version 2)


  • This guide will cover the install of e*thirteen SL rings (-8mm offset), e*thirteen UL rings (-5mm offset) and Helix direct mount chainrings which are reversible and provide either -3mm or -5mm offset. 

    The configurations shown in this guide are for industry standard chainline numbers for non-boost, boost and superboost. Our adjustable chainline spacer system allows the rider to dial in the actual chainline to optimize it for specific bikes and use cases. 

  • Start by identifying what chainring you have. 

SL Chainring product page

  • For SL rings go to step 2 of this guide. SL rings are -8mm and on 73mm spindle cranks, will work with non-boost 49mm chainline on 135/142mm bikes and "boost" 52mm chainline on 148mm bikes. When paired with 83mm LG1 DH cranks will provide 56mm chainline on 150/157mm bikes.

UL Chainring product page

  • For UL rings go to step 3 of this guide. UL rings are -5mm will work with 148x12 (Boost) bikes to achieve a 52mm chainline.

Helix Direct Mount Chainring product page

  • For Helix Rings go to step 4 of this guide. Helix rings are reversible to achieve a -3mm or -5mm offset and achieve either a 52.5 "boost" chainline or a 55.5 "SuperBoost" chalinline.

Helix Race and Helix Plus chainrings are 1mm thinner at the crank mounting location than UL or SL rings. A 1mm spacer is supplied with all Helix chainrings to account for this difference when a Helix ring is installed on a TRS/LG1 crank with adjustable chainline. This spacer MUST be used in addition to the 3mm worth of spacers already found on the crank.

If setting up a configuration where the lockring is tightening against a spacer, ensure that the spacers are sitting fully in the grooves of the mounting location so the lockring is fully compressing the system.

  • Thread on lockring with spacers in correct location for chainring offset and rear hub spacing
  • Tighten lockring to 30Nm (Snug + 90 degrees)


Thanks for reading, now get out there and ride!


Click here to view the full article »

/hc/en-us/articles/45512679683867-How-to-install-SL-UL-and-Helix-chainrings-on-TRS-and-LG1-cranks-with-adjustable-chainline-Version-2
Helix Race Carbon Crank Manual

Click Here to download the PDF


Screen Shot 2025-03-31 at 11.30.27 AM.png

Click here to view the full article »

/hc/en-us/articles/35507134877211-Helix-Race-Carbon-Crank-Manual
Helix Race GR Crankset Manual


**Click here to download PDF**


Screen Shot 2024-11-08 at 10.31.56 AM.png

Click here to view the full article »

/hc/en-us/articles/30774727373851-Helix-Race-GR-Crankset-Manual
E*spec Crank User Manual

Click here to download the PDF version

Screen Shot 2025-03-13 at 12.04.28 PM.png


Click here to view the full article »

/hc/en-us/articles/18730708191387-E-spec-Crank-User-Manual
How to Install Helix Race Cranks


Please see this link to view the expanded guide or click through the embedded guide below.


Click here to view the full article »

/hc/en-us/articles/14031150964891-How-to-Install-Helix-Race-Cranks
How to install and remove 2019-2023 CS4 XCX, TRS & LG1 Race and CS3 TRS & LG1 Plus cranks

Click here to view the full article »

/hc/en-us/articles/360034732051-How-to-install-and-remove-2019-2023-CS4-XCX-TRS-LG1-Race-and-CS3-TRS-LG1-Plus-cranks
MY23+ Helix Race 30mm Crankset Manual

Click here to download the PDF of this manual

Screen_Shot_2023-01-25_at_3.35.45_PM.png

Click here to view the full article »

/hc/en-us/articles/12006917310363-MY23-Helix-Race-30mm-Crankset-Manual
What bottom bracket standards does e*thirteen support?


There are a large number of BB standards being used across the mountain, road, and gravel spectrum of bikes. e*thirteen makes BB's for all of the most common standards but there are some standards which we do not produce a compatible components for. 


Bottom bracket standards we support: 

  • BSA Threaded: The most common threaded standard found across all brands. e*thirteen makes threaded BB's for 68mm (gravel), 68/73mm (mountain), and 83mm (Mountain DH).
  • BB 86.5/92/107: The most common pressfit standard. e*thirteen's BB92 bottom brackets will fit frames with these shell widths. 86.5 (road), 92(mtn), and 107(mtn DH). 
  • PF30 and BB30: PF30 and BB30 are less common press fit standards and we make BB for both these standards. 
  • T47 Threaded: T47 is a newer standard and not all that common. We do make a BB for the T47 Standard. 


Bottom bracket standards we do not support:

  • BB90/BB95 (Trek)
  • BB386EVO
  • BB392EVO
  • BBRight
  • OSBB


You can find some more specifics here:


Click here to view the full article »

/hc/en-us/articles/210525863-What-bottom-bracket-standards-does-e-thirteen-support
MY23+ Helix Core 24mm Crank Manual


Download a PDF of this manual here: Helix Manual PDF


Screen_Shot_2022-03-15_at_9.58.01_AM.pngScreen_Shot_2022-03-15_at_9.58.15_AM.png

Click here to view the full article »

/hc/en-us/articles/4711659569947-MY23-Helix-Core-24mm-Crank-Manual
How to install an APS adjuster

This guide shows how to assemble and install all generations of APS adjusters. Even if the outer ring of your APS adjuster looks different than the version shown here, this guide still applies to your system as well.

How to install an APS adjuster

Click here to view the full article »

/hc/en-us/articles/360034732011-How-to-install-an-APS-adjuster
MY22+ E*spec Race Shimano™️ EP800™️ Carbon Crank User Manual

Screen_Shot_2023-03-22_at_2.45.40_PM.png

Click here to view the full article »

/hc/en-us/articles/360061086711-MY22-E-spec-Race-Shimano-EP800-Carbon-Crank-User-Manual
MY21+ E*spec Plus Shimano™️ EP800™️ Alloy Crank Manual

Screen_Shot_2023-03-22_at_1.39.28_PM.png

Click here to view the full article »

/hc/en-us/articles/360058908731-MY21-E-spec-Plus-Shimano-EP800-Alloy-Crank-Manual
How to remove legacy e*thirteen cranks

How to Remove e*thirteen Cranks (2014-2017)

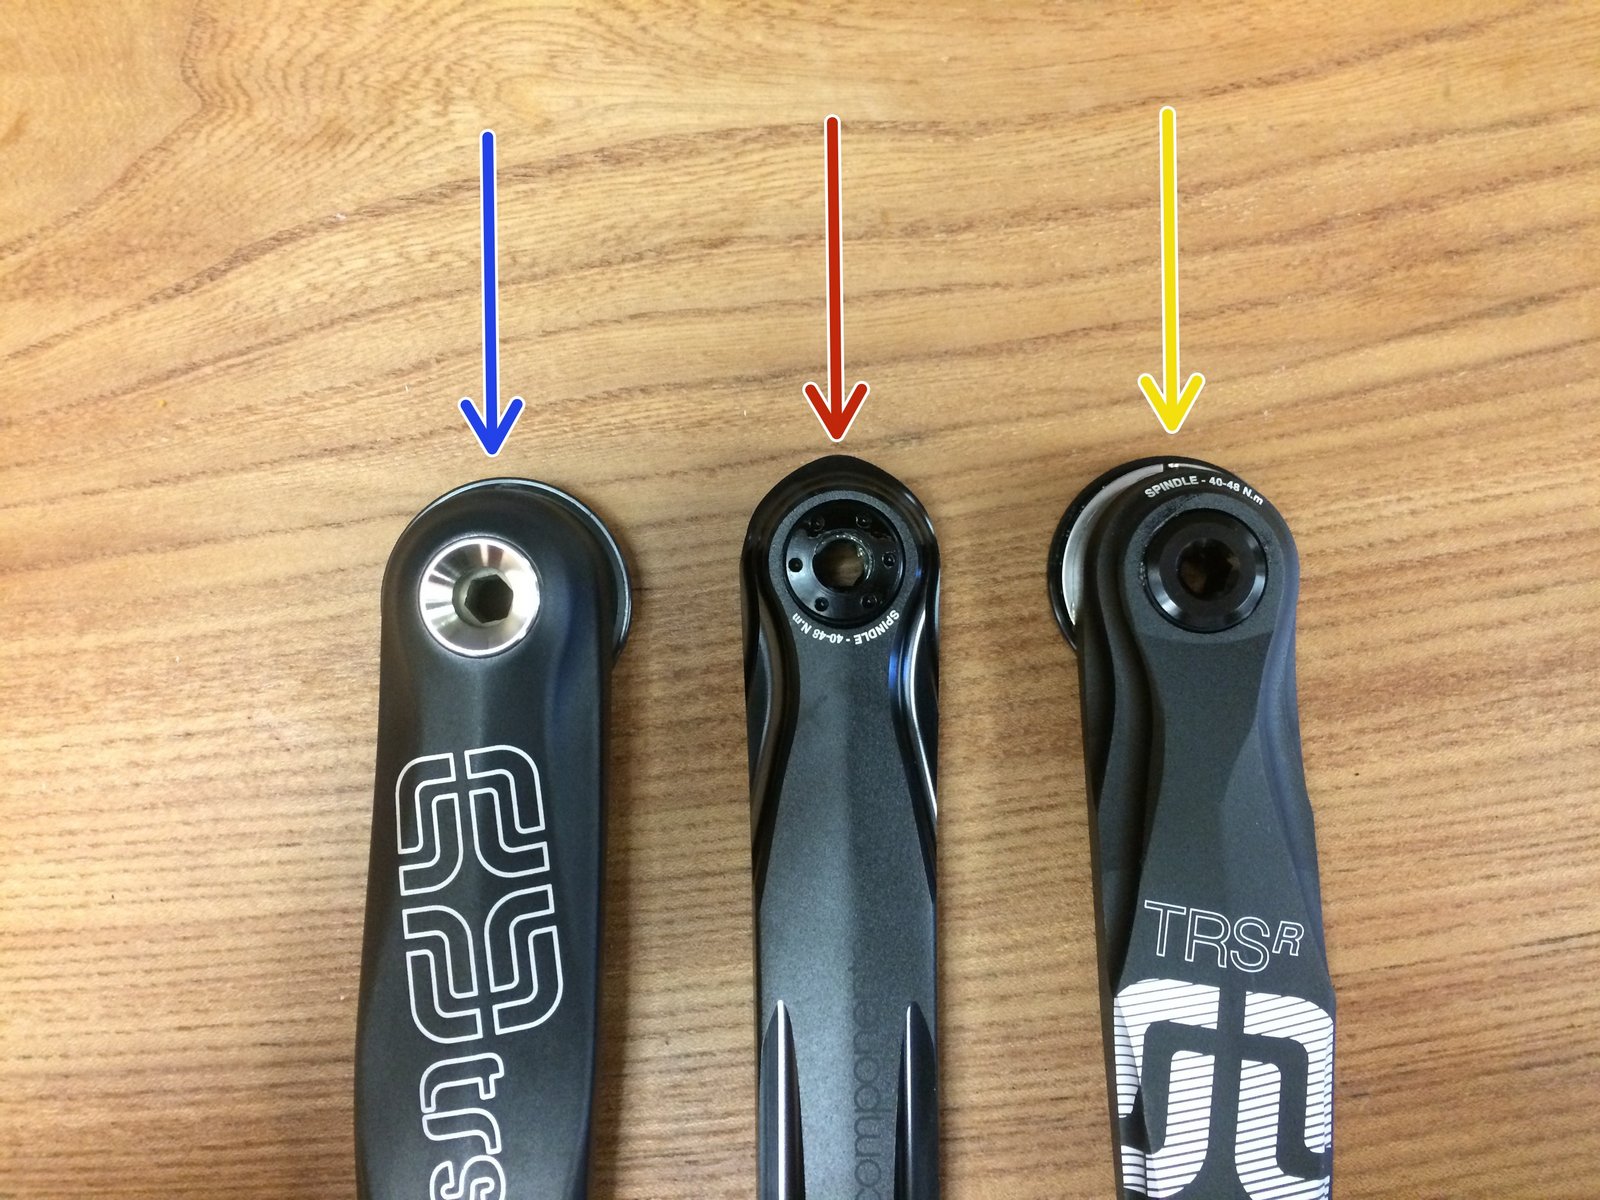
Before you begin, identify which extraction system your crankset uses. There are three primary types:

  • Carbon Cranks: Use a silver (aluminum) or black (carbon) fixing bolt and require the e*thirteen proprietary removal tool.
  • Self-Extracting Cranks: Feature a cap with six small holes over the crank bolt.
  • Older Aluminum TRSr Cranks: Use a black bolt and require a standard Isis/Octalink removal tool.

Method 1: Aluminum & Carbon Cranks (Proprietary Tool)

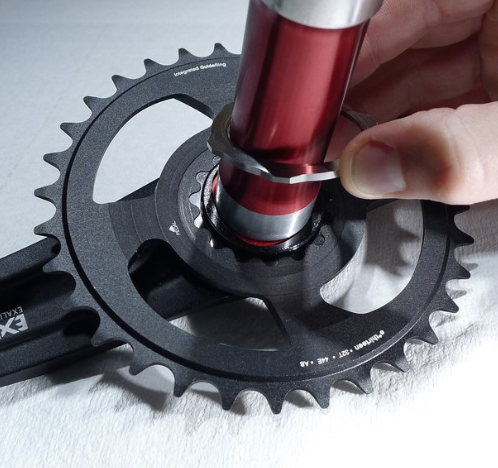
  1. Remove the fixing bolt: Use an 8mm hex wrench to unscrew the non-drive side crank fixing bolt. Ensure you also remove the bolt washer.
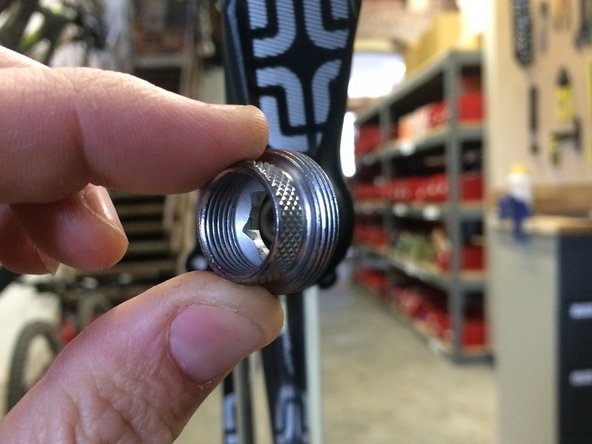
  2. Install the threaded barrel: Lightly grease and hand-thread the threaded barrel removal tool (included with the cranks) into the spindle. Tighten it until it is 100% inside the spindle threads; it should not stick out past the spindle face.
  3. Install the extractor plate: Lightly grease the threads and face of the extractor plate tool. Thread it into the crank arm and tighten with a 10mm hex wrench until snug. Do not overtighten, but ensure it is fully bottomed out.
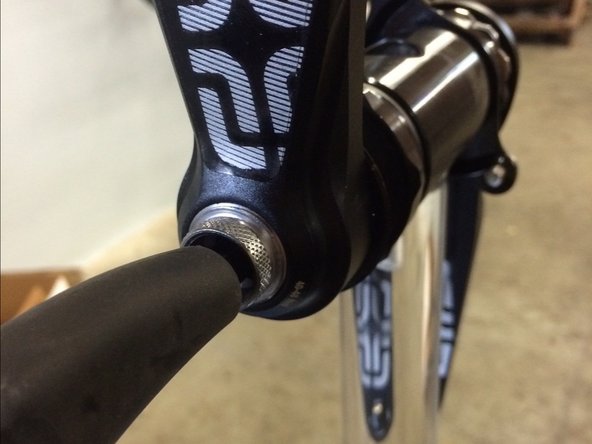
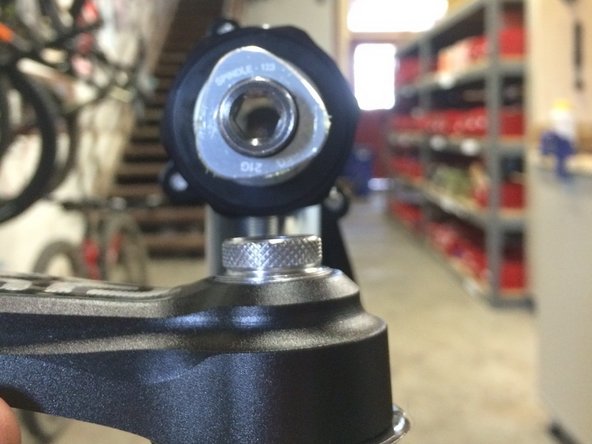
  4. Extract the arm: Insert the 8mm hex wrench through the hole in the extractor plate and into the inner tool. Turn counter-clockwise. You will feel resistance as the tool hits the plate—continue turning to pull the crank arm off the spindle.
  5. Final removal: Remove the crank arm and then unscrew the tools from both the spindle and the arm.
Lightly grease and install the threaded barrel crank removal tool (included with cranks). Our proprietary E*thirteen crank removal tool must be used on all 2015-2017 cranks.
Lightly grease the threads and face of the extractor plate tool and install it into the crank arm
Insert the 8mm hex wrench through the hole in the hex on the extractor plate and into the other half of the extractor tool
Remove the crank arm

Method 2: Cranks with a Self-Extractor

  1. Locate the 8mm hex: These cranks have a cap with six small holes. Do not remove this cap.
  2. Unscrew: Insert an 8mm hex wrench into the center bolt and turn counter-clockwise. The bolt will push against the outer cap, automatically pulling the crank arm off the spindle.

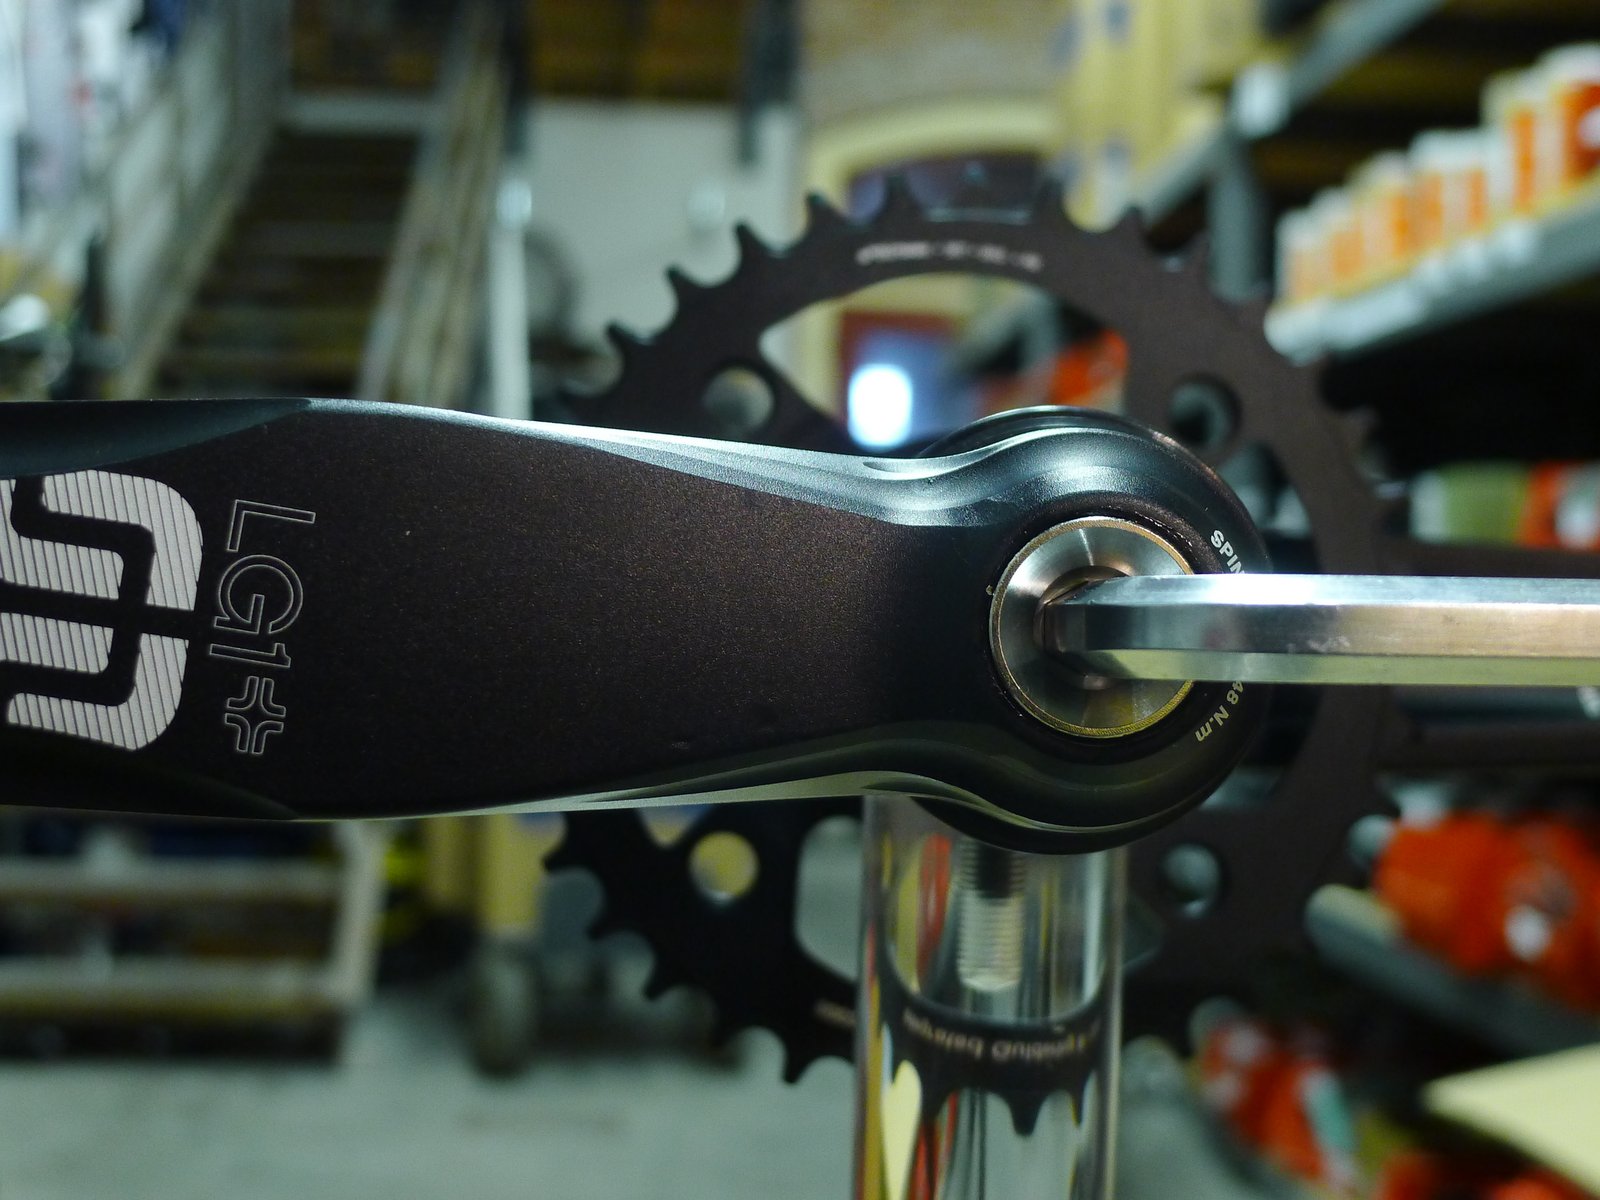
Method 3: Older Aluminum TRSr Cranks (Isis/Octalink Tool)

  1. Remove the screw: Use an 8mm hex wrench to remove the fixing screw and washer from the non-drive side.
  2. Prepare the tool: If using the Hive removal tool or a Park Tool CCP-44, grease the face and threads of the tool.
  3. Install the puller: Thread the removal tool into the non-drive side arm until it bottoms out.
  4. Extract: Use the tool's handle (or a wrench) to turn the inner driver clockwise. Alternatively, if using the "pull" method tool, thread it in and pull sharply on the pedal end of the crank arm to release it.
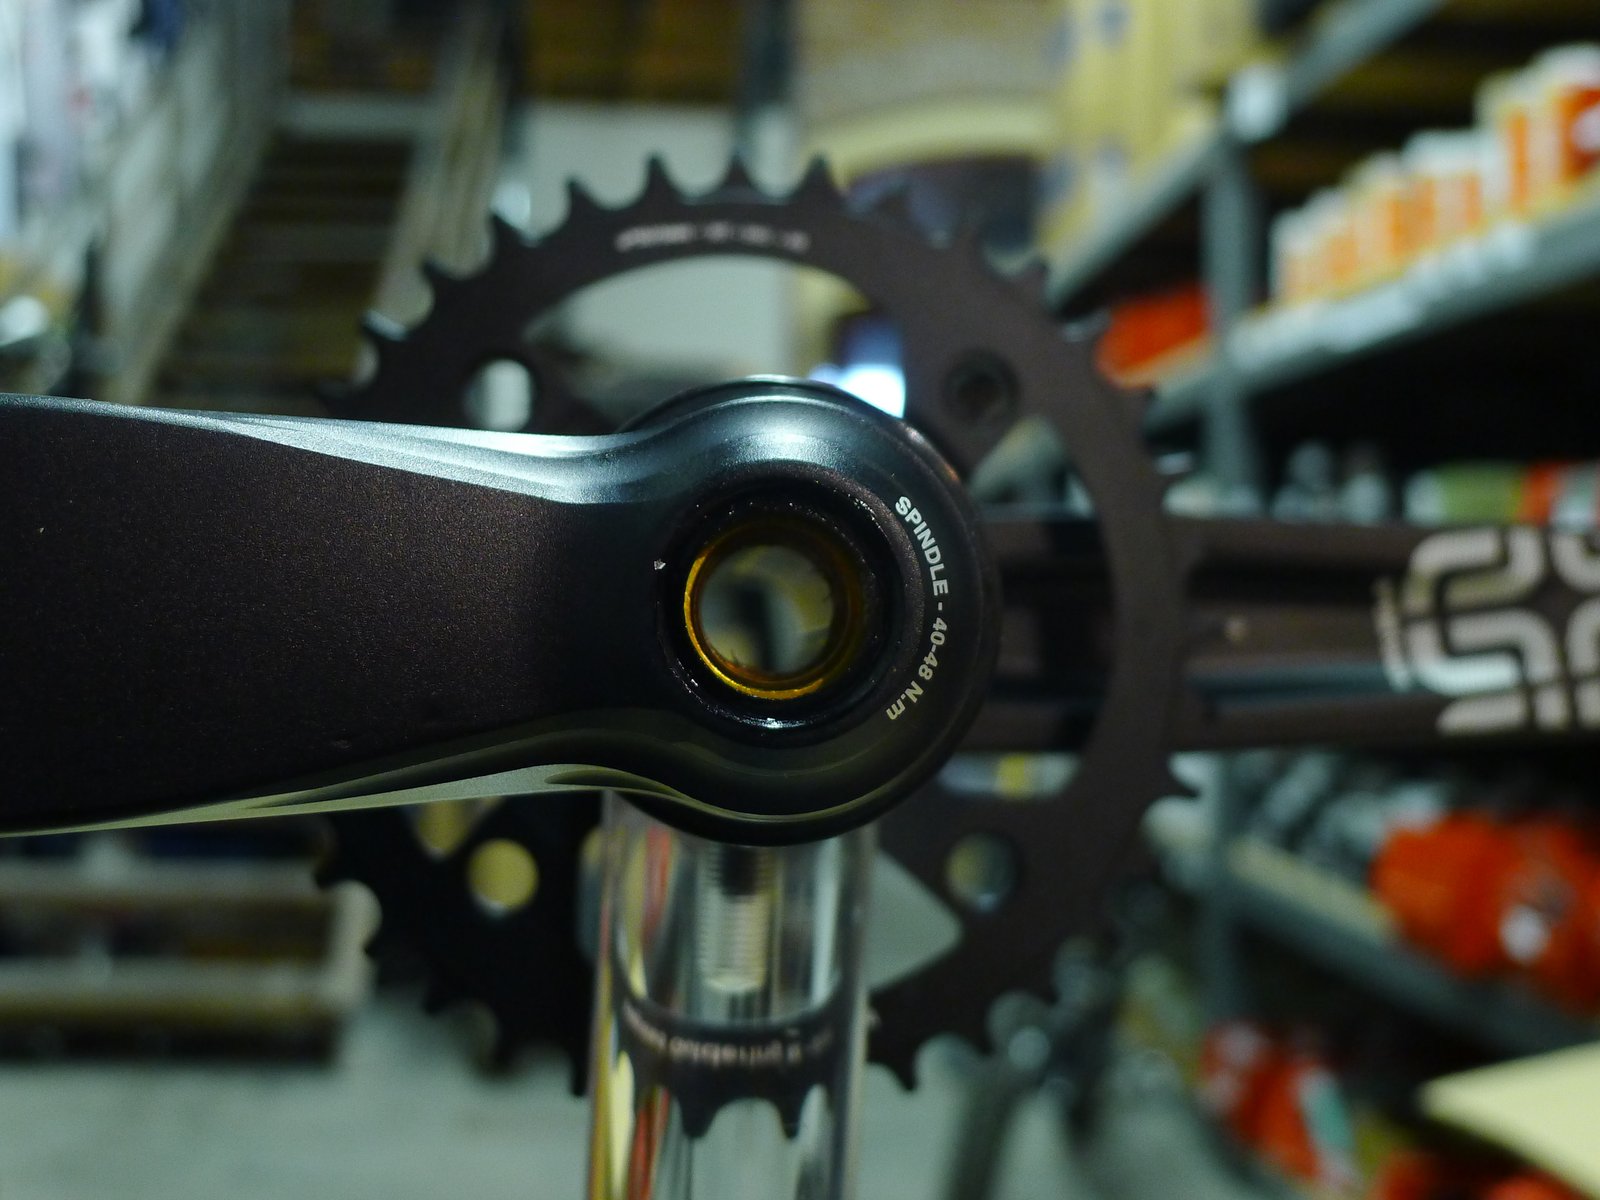
Note: Once the non-drive arm is removed, you can remove the drive-side arm and spindle assembly by sliding it through the bottom bracket. If it is stuck, a light tap with a rubber mallet on the spindle end should release it.

Click here to view the full article »

/hc/en-us/articles/210525823-How-to-remove-legacy-e-thirteen-cranks
MY20+ E*spec Plus Shimano™️ E7000/8000™️ Alloy Crank Manual

Screen_Shot_2023-03-22_at_2.39.06_PM.png

Click here to view the full article »

/hc/en-us/articles/13901569628955-MY20-E-spec-Plus-Shimano-E7000-8000-Alloy-Crank-Manual
How to install Gen 2 TRS and LG1 series cranks

How to install TRS and LG1 series cranks using APS adjuster

Click here to view the full article »

/hc/en-us/articles/208906466-How-to-install-Gen-2-TRS-and-LG1-series-cranks
MY19+ XCX, TRS and LG1 Crank Manual

Crankset Setup

For TRS/LG1 Cranks with Chainline Adjustment

mceclip0.png

For XCX Cranks without Chainline Adjustment

mceclip1.png

Install Chainring on Drive Side Crank Arm and APS Adjuster on non-drive side

mceclip2.png

Install and tighten crankset, remove BB Clearance with APS

mceclip0.png


MTB Bottom Bracket Setup (For XCX Gravel see below)

BSA (68mm/73mm/83mm Shell Width)

mceclip1.png

BB92

mceclip2.png

PF30

mceclip3.png

T47

mceclip4.png


XCX Gravel Bottom Bracket Setup 

BSA

Screen_Shot_2022-01-11_at_11.11.23_AM.png


BB92

Screen_Shot_2022-01-11_at_11.10.26_AM.png


BB30 / PF30

Screen_Shot_2022-01-11_at_11.12.43_AM.png


T47


Screen_Shot_2022-01-11_at_11.13.41_AM.png

Or click the link below to download the complete Manual in PDF Format.

Click here to view the full article »

/hc/en-us/articles/360032214272-MY19-XCX-TRS-and-LG1-Crank-Manual
How to install threaded bottom brackets

How to install threaded bottom brackets

Click here to view the full article »

/hc/en-us/articles/210525923-How-to-install-threaded-bottom-brackets
How to install PF30 bottom brackets

How to install PF30 bottom brackets

Click here to view the full article »

/hc/en-us/articles/208906526--How-to-install-PF30-bottom-brackets
How to install BB92 Bottom Brackets

How to install BB92 Bottom Brackets

Click here to view the full article »

/hc/en-us/articles/208906506--How-to-install-BB92-Bottom-Brackets
Bottom Bracket (BB) Manual

Bottom Bracket Setup

BSA (68mm/73mm/83mm Shell Width)

mceclip1.png

*For BSA 68mm shell with XCX Gravel cranks, use 1x2.5mm spacer drive side, no spacers non-drive side

BB92

mceclip2.png

PF30

mceclip3.png

T47

mceclip4.png


Or Click below to download a PDF Manual

Click here to view the full article »

/hc/en-us/articles/204106349-Bottom-Bracket-BB-Manual
How to install BB30 bottom brackets

How to install BB30 bottom brackets

Click here to view the full article »

/hc/en-us/articles/210525883--How-to-install-BB30-bottom-brackets
How to Install LG1 and XCX Cranks that use a wave washer and spindle spacer pre-load system

How to Install LG1 and XCX Cranks that use a wave washer and spindle spacer pre-load system

Click here to view the full article »

/hc/en-us/articles/210525803-How-to-Install-LG1-and-XCX-Cranks-that-use-a-wave-washer-and-spindle-spacer-pre-load-system
How to install and remove TRS crank spiders and integrated rings

How to install and remove TRS crank spiders and integrated rings.

mceclip0.png


Click here to view the full article »

/hc/en-us/articles/208906446--How-to-install-and-remove-TRS-crank-spiders-and-integrated-rings
How to re-grease bottom bracket bearings

Click here to view the full article »

/hc/en-us/articles/208906606--How-to-re-grease-bottom-bracket-bearings
How to replace gen 3 BB bearings

How to replace gen 3 BB bearings

Click here to view the full article »

/hc/en-us/articles/208906566--How-to-replace-gen-3-BB-bearings